24 May, 2012

Sabriel Final Film

This is the final version of the animation. For some reason when using the software to render it, it added the pixelation in the artwork. Sadly it had been rendered on HD and therefore, cannot be amended.


I have looked at the feedback people have given me and taken it into consideration with my final animation.

I hope you Enjoy~

Communicating Through Story Characters

I found this preivew of the book online and thought it could perhaps be of interest as it describes how you could create and communicate a pre existing character successfully. The information was taken from Google Ebooks


Communicating Through Story Characters: Radio Social Drama

 By Pamela Brooke

Looking at Lighting


Light stuff

There's really just one kind of light. It bounces. You can only see the light (photon) if it enters your eye. Light does two important things when it hits a surface. First, a part of it is absorbed. This is how colors are made. A red apple reflects mostly red wavelengths, the rest are absorbed and turned into heat or something. That's why black stuff get so hot in the sun. Anyways, the reflected light bounce away differently depending on the surface. If the surface is bumpy it will bounce away sort of randomly, like a tennis ball that hits rocky terrain. If the surface is smooth it will bounce away in a predictable path. A mirror is very smooth so the light comes back undistorted, so we can see our reflection.
Note that all surfaces have speculars, because speculars is just reflected light. It's just more broken up/diluted on dull surfaces.
Depending on where the eye/beholder is, it'll see different light and different specular spots on a curved surface such as this. A puddle isn't curved (other than the edges because of surface tension) so you'll only get a shiny reflection from a certain point of view. Point speculars can only appear in an environment where there's a point light source, like a sun, lightbulb or small window. 
Photo - Speculars do exist on cloth, diluted and subtle. I stretched out my shirt sleeve with two fingers to get a flat surface between the two marked dots (I moved the camera and not the sleeve).
Here on earth we have lots of stuff around us that the light can bounce off, so things here are more or less lit from all angles. For example we have the sky which is like a dome shaped blue light source. Then theres the ground, walls and other surfaces. In space there's basically just one light source, the sun. This is why the moon just has a lit and shadowed side, and looks kind of flat. If you looks carefully however, you can see earthlight on the shadow side of the moon, but it's very weak. Then there's starlight, which I guess is even weaker.
When light hits a surface and bounces, it also change color. If it hits another surface of the same color it bounced off, it will make that surface look even more saturated.
(Too orange to be some sort of skintone anyways.)

Exposure

The sunlight is much stronger than the skylight, which is in turn much stronger than indoor light. Our eyes adapt automatically after a while, and we can also adapt by squinting or just focusing on an object. Because we do this without thinking about it, it's hard to understand that our eyes are actually kind of limited. This limitation becomes even more obvious with cameras. If you take a picture indoors, the windows will become overexposed (bright). You might try to adjust the exposure levels to the window light, but then the indoor environment will become underexposed. This can be used to your advantage. By for example putting a character or object in the foreground where it's darker, you can make the silhouette read well against a well lit room.
The exposure to light can also make parts of a body look very bright or dark, not skin tone color at all. When the shadow is dark and the lit side is overexposed, the only place for the color to go is on the edge between them.

Materials

Here's an example of various materials and how i render them.
  • Cloth - Hardly any speculars, just shadow and light. Sometimes strong light can penetrate thin cloth and cause some sort of subsurface scattering.
  • Leather - Can be a little gloss and thus have a few speculars. Also, don't make it too saturated.
  • Trees and wood - Dull. Not very saturated either (sort of grey-brown-sienna).
  • Stone - A bit like cloth. The surface is often to rugged (both at micro and macro levels) to have any serious speculars.
  • Plastic - It seems like the speculars and reflections are colorized in the color of the plastic. Plastic can also be a bit transparent.
  • Gold - Gold isn't orange. I use black - desaturated orange sometims with hints of green, then up to yellow and white.
  • Silver - More or less like a mirror.
  • Metal - In the case of armours I often push the values a little more, not as much midtones.
  • Brushed metal - It's sort of like an inbetween of a grey surface and a silver surface.
  • Glass - Often just transparent with distortion. The speculars come suddenly and are often white. In the case of car windows you might have noticed that it's easier ot see what's behind if there's a shadow over the window. The brighter reflections obscure.
  • Wet stuff - more speculars, can become transparent in the case of cloth, and stones get more saturated and pronounced details.

Shadows

Shadows are quite flat and generally less saturated than the lit side. It's easier to notice ambient light in the shadows. Shadows get blury over distance, this is called diffraction.

(Shadows don't add (multiply) with just ONE lightsource that is...)

Skin tones

Consider the environment. The light is stronger outside, and the skin color tend to be less saturated due to the sky blue ambient light and sky blue speculars. Sometimes the skin color become shifted towards purple because of the sky blue being mixed in. This is especially true if the subject is standing in a shadow.
Indoors (no windows, only light bulbs) the light is warmer and allows skin saturation to be amped up to oranges and reds.
The shadow color of the skin can sometimes wander off to greens, especially if the room have green components, like wallpaper, plants, furniture.
In a white room or a bathroom the skin tones would be quite pale, closer to local colors and less contrasted (shadow/light) due to lots of ambience.
A room with a single strong light source will probably result in near black shadows.
...so, the type of environment your character is placed in very much affects how you should render it.


I have looked at all of these things and learnt from them. I have also incorporated into my own design and therefore given some more dimension to my character.

Comparison of Films


Comparing Beauty and the Beast with Edward Scissor hands


Beauty and the Beast

The film although haven been drawn by hand shows imperfections, something that is rarely seen in modern 3D animated films. Sadly in some cases this gigantic achievement has been equalled if not outdone by the next generation of computer animation.
vs


Edward Scissor Hands


Looking at both of these you can see that they influence from a gothic period. Their storyline is conveyed very similarly to one another. Both shot in a castle, with a ‘beast/monster’ a beautiful heroine to the rescue who has been able to look past his monstrosity and finally the villagers who seek the ‘beast/monster’ out. Analyzing both of these films it’s interesting to see how different they approach the treatment of gender and sex.

Useful tips for Digital Painting


The onion (Thinking in layers)

Before laying down a stroke, there's a number of things you need to think about. Well, actually you shouldn't have to think about them, it should just go automatically.
  • Feel volume and angle of the form.
  • Where is the light coming from?
  • Try to figure out if there are any shadows that might be falling on the surface.
  • Is there any reflected light (radiosity) that hits the surface?
  • What is the ambient color of the scene? (sorta like global reflected light.)
  • Any speculars. Is the surface gloss/wet and also angled so it reflects a light source, such as the sky?
  • The exposure level. Perhaps it's so heavily lit that it becomes more than white? Perhaps it's so dark that even the brightest spot is hidden in darkness.
  • Is there any fog in the way?
  • The texture of the surface.
Note that this mainly goes for realistic styles. A brushstroke should also look efficient and consistent with the rest of the painting and your color scheme choice. You might also have an idea or style which disallows certain colors or textures and puts priority on other things. However, even in a powerpuff girls illustration there's simplified elements of realistic rendering. Don't hide behind "it's not apart of my style so I'm not gonna learn it".

Orders of importance

Very generally speaking, certain apects of a painting are more important than other.
  1. Construction - What are you trying to paint? Your subject and composition should work on a fundamental level. If not, then no rendering in the world can save it. Don't have any illusions that you will be able to salvage the piece later. If a pose look wrong now, it will look stiff when finished too, even if Rembrandt himself painted it.
  2. Values - For a painting to work you need to use values to sculpt the forms. Values can do a lot of work grouping and separating shapes. Example 1 - The first version here is obviously wrong. Each shape has just gotten the shadow and highlight treatment. Second one is better but there's just one value type. Third one has different values on different shapes. Maybe it fails at the construction step though; it's not a very interesting pinup. Example 2 Here both value and color is used to separate the foreground and background, although I don't like this painting either, again it fails at construction.
  3. Color - You can be a little off with the colors (hue and saturation) and still get away with it. If you just can't make the colors work, it is probably the values that are wrong. On a side note, if the previous steps do work, it's easy to make fresh looking images with color balance tools. In my experience the original choice is often the best.

This is taken from a tutorial by Arne Niklas Jansson - 2005 & 2007 


I think it is quite useful when looking and telling you how to paint. Although digital painting isn't something new to me, I have often found myself always coming back to the same three tools. Sadly I know realise that i've been doing int wrong and this isn't the way about it if I am to get more realistic results.

How I work

I thought it would be interesting to introduce people to the way I work when creating an animation. Many people have different ways of doing this, however, for me when using Photoshop I quite like the overall design and atmosphere I can create from it.

General Research


This is an old film done in the style. I watched it mainly for the water. The way it has been done in pencil is very good and very reflective of the overall style. This also maintains consistency with what's currently been shown.


A simple animation showing the effect of a pebble going into the water and the ripple effect it has.

In my animation and the story itself it mentions a hand coming out of water. This image is quite interesting because of the way it has been composed/edited. I think they could have done a little more on the reflective surface but the overall result is interesting. The angle and perspective also add interest to it immediately.
From 20:42 - 20:46 is the type of rotation I wanted to include in my animation, sadly I didn't use this in the end because I didn't think it was necessary.

This is the scene from Pocahontas. I used it as reference for my animation. It is in one of my hair tests which can be found in the Sabriel Test on the right hand side of the page. I like the overall flowyness of the hair, however, I dont think it will be suitable for my own animation

Backgrounds


I looked at castles because I thought it would be useful for the animation.  I am going to use a castle for the opening sequence to the animation. UPDATE: Having looked back at my animation and reflected on what i've done so far, I think that the castle is better at the end.


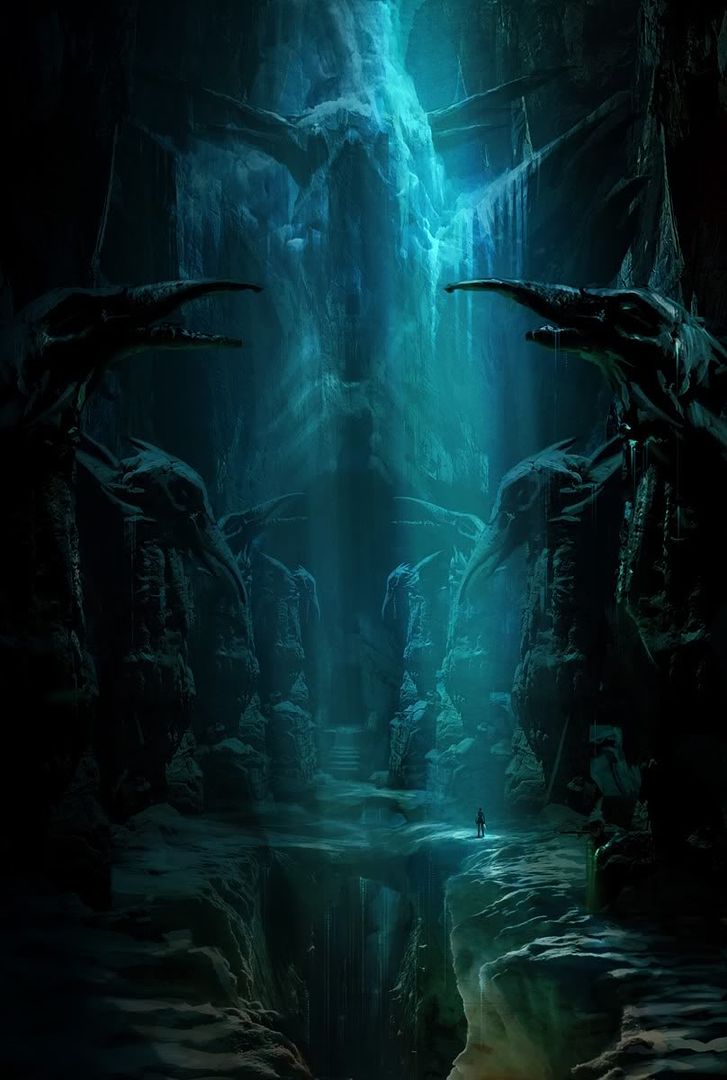
I looked at concepts from Tomb rader. I like the overall feel of these designs. For my underworld scene I want it to feel damp and wet and I believe that these convey it very well.

The inspiration for the snakes probably came from this concept that I showed Keanu Jones. I believe that his background has taken influence in this and he has successfully created something using the same colour scheme and atmosphere.

The perspective and sizes show how small the character is in regards to her surroundings. We can also gather from this that 'spotlight' is useful and quite effected to illustrate the characters presence.

This is the final concept. I was planning on featuring something grand in the middle of the room like a waterall in the cave however, I don't feel this is necessary for the design that I am trying to portray.

Sabriel portraid by others

 
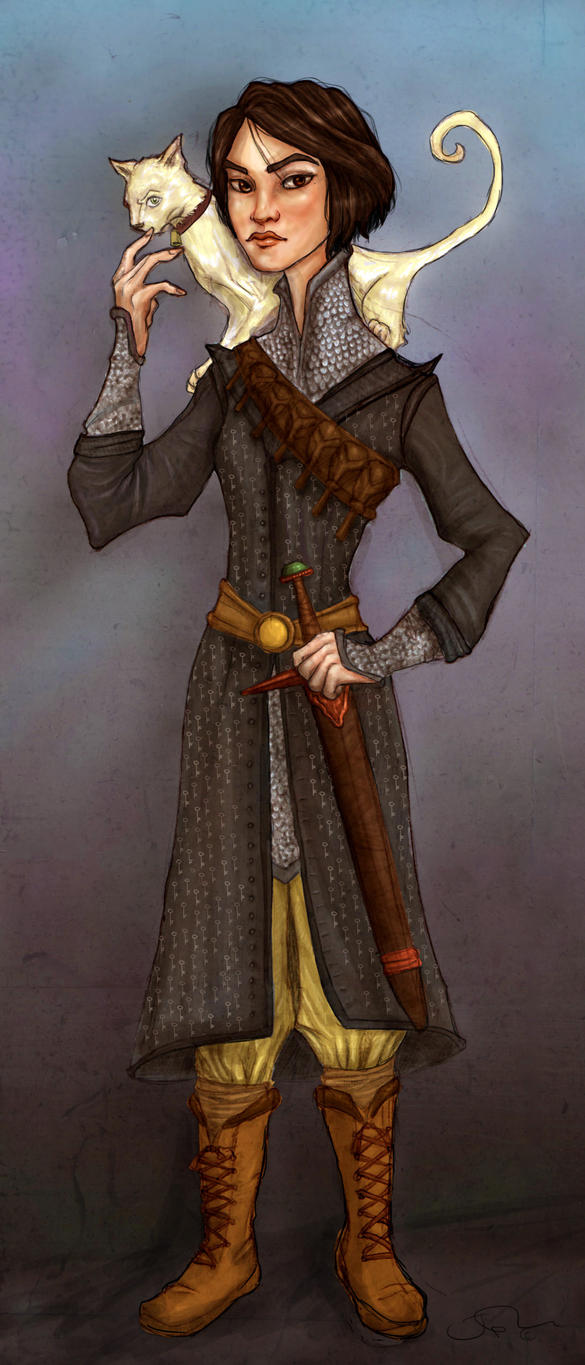
This illustration of Sabriel and her pet Moget is quite cute. I like the simplicity. Although certain things in the drawing aren't well, I like the fact that it's not been drawn in a Japanese Manga style. Her eyes and features seem quite manly which is interesting as it contradicts what I am aiming to do for my animation.

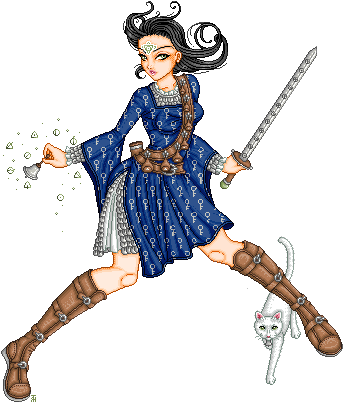
This is a pixel art from Deviantart of Sabriel and her pet Moget. I like the style of it, and the incorporation of the bells. I like the fact it was done in pixel art as this is a very long process. I appreciate that they included Moget into the illustration because it's not really taken into consideration through other fan art out there.  

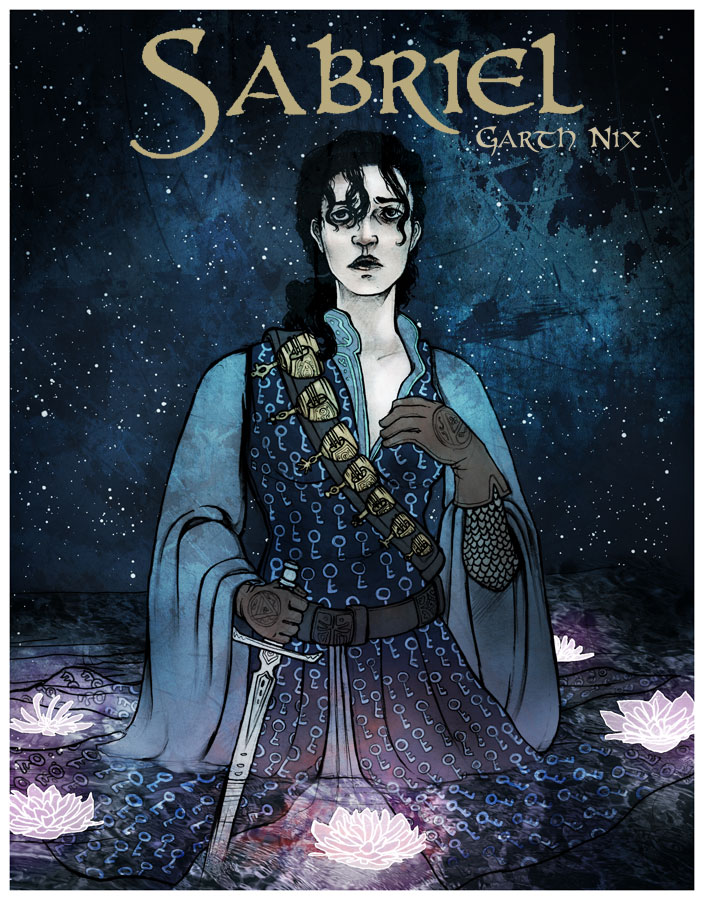
I like this design of Sabriel, I think the glow of the lotus flowers has a magically feeling and have a deeper meaning which can be related back to symbolism of the flower. Unfortunately I feel this style is Gothic and therefore unsuitable for my Target audience.


Reviewing

In-depth Review

Before commencing my final project I have been looking through my previous work and feedback received to produce aims and learning outcome for my final piece.

In previous works I feel I have often managed to use basic animation and flat colours. However sometimes I have not always taken into consideration the background or scene they may be in. In the animation “Let The Truth Be Said” I may often have focussed more on creating the character and animation itself, as this is where my interests are more than thinking about the relevance of background and setting.

Feedback on my previous pieces has suggested the need to change the focus of the character and incorporate the overall design. By isolating the characters from the background and not taking into account colour schemes this has sometimes made it look off balance.

My career aspirations still firmly lie in the field of character design therefore I particularly hope to demonstrate my abilities in this with my final project. I intend to research into memorable existing characters analyzing how their creators have made them so memorable to us.

I hope to incorporate this along with my other aims to produce a final piece that will both progress my own animation skills and show my abilities as a character designer.

Through-out the project I have sought feedback weekly from my peers. Having lived with Fay Maxim who studies the same course, we have been able to communicate throughout this project and made the sufficient changes. I've also spoken to the lecturer at early stages and applied the changes he deemed necessary.


For this project I also had to communicate with Lvl5 in order to help my project. For me the help of Keanu Jones was vital as I know how capable of a 2D designer he is. I found the communication between us to be important and  necessary for him to understand what I needed out of him. Thankfully, he did an amazing job with the backgrounds and added the extra spark my animation needed. He also taught me a lot about 2D and Digital painting which will be useful for later on. eg: 


  • "with digital art, you'll find yourself COLOR-PICKING alot
  • so yeah, just try and get comfortable around photoshop and develop a paint style
  • and you'll get faster and faster each time you practice
  • ok, I'm off~
  • little hint
  • in photoshop
  • press CTRL+ALT+CMD and click-drag on the canvas
  • you'll see something helpful appear"

This is important as I appreciate this is a much more realistic example of how an animation would be developed for a client with ongoing feedback and subtle changes. (The examples can be seen in my tests page where videos have been placed and ammended). It also highlighted the further importance of working to a deadline, ensuring projects and sketches are started early with regular feedback to allow early tweaks and changes to be made to create the best outcome. Whilst in previous projects I may have worked to my own brief right through to my final concept, this pattern with regular feedback and input from others made it much easier to incorporate tweaks and suggestions. This is what would be needed if working to a client’s specification, regular project updates to allow modifications to produce a project they would be most pleased with
 

Aims


Aims:

For this project I hope to produce a teaser trailer animation that promotes the story Sabriel by Garth Nix.

What do I hope to achieve out of this animation?

I hope to change my usual style of illustration into something more Disney and successfully convey a snippet of the book into an animation. As a future character designer, I hope to look into the appeal of the character and thus enabling me to create a character that is enchanting.

Visually:

I am hoping to achieve a magical/ mystical atmosphere within the animation. I think the use of blue hues will succeed in enabling me to do so. I also hope to achieve a style that changes from the usual Anime into something more classic such as Disney.

Technically:

For this animation I have decided to animate it in Adobe Photoshop. I know that most people prefer to use flash when designing in 2D because it’s a vector based program, however, I feel that I can achieve a better design due to the brushes and wide variety available pre installed in the software.

Animation:
For my animation itself I hope to achieve a short teaser trailer to promote the book. The book was published back in 1995 where it was highly acclaimed as one of the best fantasy novels at that time. I aim to achieve something that will stir up interest and once again remind people of just how good this trilogy is.

Principles:

For me as usual, appeal is one of the most important things. If I can’t get the audience to ‘believe’ in the character then I believe I haven’t achieved my intended purpose. Furthermore, Timing, Weight, Squash and Stretch, Arcs and Anticipation have been considered.

Target audience:

My target audience is the younger audience/teenage children. Although the story itself is quite dark and published under the teenage fiction, I’ve attempted to soften it slightly into something that could be viewable for younger age groups 6-15.

23 May, 2012

Sabriel Tests

Animation Test


This is a quick test of what my animation would look like. There isn't any scenes properly done, however, it gives an overal view of how I want the animation to look. I am quite pleased with the structure of it and believe that it will be able suitable for the target audience.

Running

 
This is a run test from the back. I intially did the smallest size and then decided to scale it up to three times. This was to see how much you could see depending on how close or far the camera was. I think it's a good experiment and I was able to learn a lot from this.
 
This is the first test of the run that I did. Having it run in negative space is handy however, I think it would be better to look at what the animation would be like if it were in a background.

 
I wanted to do a running cycle test to see whether I could incorporate it into my animation. I put it with an old background I had created to get an idea of what it would be like. I am very pleased with the fluidity and results of the animation.
 
I had no idea how I was going to animate the hair. I decided to just go in and tackle it without really considering any reference. As you can see from this video it was pretty useless. The hair looks and moves very badly. I will redo this at a later stage when I am animating the running scene.

Hair


For this sequence of hair I based it from Pocahontas. I wanted to do something similar, whilst including the the right amount of fluidity in the hair. Sadly I believe that there isn't enough frames in this and therefore it looks slightly jittery.
  
 After doing the previous animation I looked at my own animation and decided to do a rendered version of this. Unfortunately I still believe that the hair is still slightly static. I've taken into consideration the direction of the wind and kept it consistant through-out.

Bag and Hand

 
I drew the bag and the water. I didn't really animate the water, however, by using a block of colour I got an understanding of how the bag would look when it was submerged and when it got resurfaced.
  
I wanted to add a bit of perspective to the drawing and therefore looked at a waterfall/cascade. I think this angle adds a bit more interest to the overall look. I looked at the water from a film and referenced how it moved.
 
After getting someone else to do the backgroudn for my animation, I decided to once again look at the hand. I wanted to see if this was okay and the hand would work by going up and down with the set background. Thankfully it worked well and the background added some dimention to it.

Rotation

 
This is a rotation test I did. I am pleased with the overall look. I have considered the timing and the weight. I know there isn 't any hair in this example however, I was mainly focusing on the movement of the body and the timing.

Summoning

 
This was my first attempt at drawing the body sumomning. I didn't really change much of it. Instead of drawing it I decided it would be best to simply copy and paste each layer on top of one another and therefore create a fast animation. I realize that this was lazy and can be seen on the final results. To improve this I should consider the body and the movement rather than simply copying and pasting the arms.
 
I have begun working on the lineart for the animation. This is just a test to see if it will work. Sadly I know there is an issue with the timing which will be rectified for the final animation. Overall I am pleased with the results.

 
This is a better development of the summoning. I feel that the fluidity in the body is a lot better. I think the summoning of the orb works well aswell :).

   
I am happier with the result of the animation with the hair. It looks and works a lot better now. Therefore that has made me improve my own animation.

Here I was attempting to incorporate a better use of the hand movement with the hair. I realise that the hair is still flying about and doesn't really look believeable.

 
 I used base colours heres to get an idea of the animation. I also fixed a few glitches in the hair. I'm still not happy with the hair however, I'm getting a better understanding for it.

Rain

 
I wanted to do an animation of rain. In the end I didn't use it. I read from a book that in order to create a useful sequence in rain you must rotate it from time to time. For example, you have four frames, it would be 1,2,3,4 then perhaps, 4,2,3,1, then 3,2,1,4 etc. By doing this I would ensure that the rain doesn't stay consistent and makes a more believable animation.


Research

Summoning

  
I wanted to know how to base my characters animation/ interaction. I thought that by conducting a few experiments it would be usefull in order to understand the body and the way it moves a bit better.

  
In order to make sure that I have sufficient reference, I conducted each recording once or twice. This meant that I could pick and decide which would be better when using as reference for the animation.

 
I couldn't decide at first how I wanted my character to summon the orb. I thought of different ideas and got reference for it. I thought this example would be a bit cliche as it looks like she is creating something from her hands.

Running


 This is a running test for a female from the side. I know that the way a woman/girl run is different from a male and therefore, I know that it would be more useful if I had a female running as my character is a girl.


This is a run from the side. You can see that the tempo and the weight from the body shifts. Also having taken the way the hair moves and the archs in the body to create a suitable balance.

 
Shooting the running scene from a different angle.  This is to make sure that it's consistant etc.

 
This is the run from the front angle and therefore will be interesting to use for the animation. I might use it in the final piece, however, if not, I will ensure to make sure a reference video out of it

 
I am also taking into consideration how the hair is moving because this is an angle that I will choose to do this for my final piece.

 
 This is run from the front. I thought it would  be useful. But in the end decided not to bother because it wouldn't be relevant for the overall design of the animation. 

 
This is a run with a slight twist on the camera. I was looking at a clip from naruto where they did this and thought it could be incorporated into my animation. I decided in the end not to bother with it.

Hair

In order to understand hair  I decided to shoot a couple of tests to see how it works. I've found out that it works simply by going up and down. Although, this was shot with a normal hairdryer... The conditions outside didn't change much of the overall flow.
 
I needed to ensure that the test that I had done was not the same. For this I had to do a couple of tests and concluded that it was indeed purely relying on the person.
 
 
This is a shot from the side of the hair and the back, as my character will be running in the animation, I thought it would good to see the hair being blown by wind from all angles.

 
Having conducted this hair test on someone else, I have concluded that hair is very much dependant on the person and type of hair they have. Some people have thicker and wavier hair, thus creating a completely different result.


This is the video  my friend made when he had longer hair. As my character rotates there is no movement in the hair. This video has allowed me to understand how hair moves and what can be done with it.

Hands

 
I wanted to look at how the hand moved and therefore did some experiments with a 'sack' of chocolate. I realize that sometimes the bag got stuck so reshot it.


When the hand is going back into the water, I wanted it do something. For this reason, I thought it would be useful to adda bit of realism with the fingers. I also noticed that it would be more interesting if something would be happening.

 
I wanted to add a bit of rotation to the hand when releasing the bag. I realise that the bag got stuck in my hand and therefore didn't become very useful. I decided reshooting this would be a better idea.

  
This shows the hand from a further perspective. It also shows how slow the fingers move when releasing the sack. This is what I had to take into consideration when animating the release of the sack.

Elements


The water coming from the fountains was a good part of reference, however, I dont believe that it would be vital or necessary for the animation as the water is coming from a different source.

 My animation is based in the underworld and therefore I needed to have a design that reflected this. For me creating a feeling of dampness and a cold atmosphere was one of the key points. I had water and therefore needed to understand how it would move and also, animate. 

 
 I was looking at fire because I thought it could be incorporated to the overall design and feeling of my animation. After developing and looking at my strategies I concluded that this was no longer useful or relevenat to the overall animation.

12 April, 2012

Baby Animatic

This animatic is too perverse and wrong. I dont feel comfortable in doing this kind of illustration. I have demonstrated how I would have done the story of Sabriel for an 'older' target audience.

Teaser Snippet Script

Sabriel

Who will guard the living when the dead arrise...?

Sabriel ran forward and an arm pushed out towards her, the neck of the sack clutched in its fingers. She reached out, missed, then tried again. The sack was secure in her grasp, as the current took the creature completely under. Sabriel looked after it, hearing the roar of the First Gate suddenly increase as it always did when someone passed its falls. She turned and started to slog back against the current to a point where she could easily return to life. The sack in her hand was heavy and there was a leaden feeling in her stomach. If the messenger was truly Abhorsen's, then he himself was unable to return to the real of the living.
And that meant he was either dead or trapped by something that should have passed beyond the final gate

09 December, 2011

Research


a selection of trailers that have type on it, this can show just how varied they are when it comes to selecting an adequate font face.


The text overlaps the movie whilst it's still playing, for this reason they have had to ensure that the film is kept quite dark so they would be able to read the information through-out the trailer


The paranormal trailer looks at a selection of shots that may look into key frames and stuff.


12 May, 2011

Choo Choo Bar

Evaluation:

The experience of the project has been a mixed ride from day one. Upon meeting the members and creating the group, it would seem like things could only go well. After the introductions were made and we went to collect our own research, we found complications began to arise. Primarily were the members of the group didn’t attend. It left us somewhat disadvantaged because of certain expectations that couldn’t be met. For saying this was a group project, from the original 7, only three were consistent throughout.

Working with a group will always have its complications. It can be because of miss communication or just mismatch of personality.

The way in which the other people attacked the project was interesting. I’m used to being more reserved and structured, yet found myself liking their method or working. Still demanding, yet somehow it felt freer. Coming from a Graphic Design background, I am used to tight design and working once again with Graphic Designers reminded me of that.

After several weeks, our synch began to fade. Less and less people started to make it to the group meetings. Each week, felt like we were taking one step forward and two back. When people turned it, they didn’t like what was done so we had to change. Eventually, we realised this wasn’t a way to work and therefore changed the choices. Those who didn’t attend didn’t have a say. It seemed tough and strict at the time, yet seemed to convey the message across.

Overall, I’m not sure how I’ve felt. Whether it’s the way we have approached the work, the different styles involved or redoing things over and over constantly. I’ve learnt the technique of Rotoscoping and found out how demanding it actually is. Although the motion is accurate, the length to create the final piece is a lengthy one.

Given the overall effect, I am pleased with how it turned out. I think those who attended mostly have worked well and it has been reflected in the final piece.

This advert came out at the right time with the animation. I don't know what the train thing is called, however, know that it was very useful to look at the squashing of the body. I came across it one day watching tv, and knew that it would be something which could influence both my camera angles and the movement of this machinery.


I wanted to use Charlie Chaplin's Train robbery, because it was based on the heist. Although not exactly based on the same concept as our heist (using horses instead of carriage) the way the pull it and the exaggaeration of the characters acting is what helps it and makes it what it is. I like the black and white appeal as well as the sooty texture you can get- somewhat grainy, something seen less commonly in todays animations/videos.


This isn't quite the scene I wanted to base it off, because I was looking for the film one NOT the videgame, no matter though. The concept still remains.... there is a heist and you have to solve it. The background design work is similar to what we have done as are the extra pieces in the landscape. Overall, you could say that this is one of my influential pieces.

At the begining of the project, we were going to do a project based on the Alice theme that I had created. Unfortunately to do artistic difference, and influences from other members the design got simplified and had to be changed. I do like the film effect that I applied. I still believe


This song has a catchy tune. It seems that this is the perfect time to launch this product. The choo choo bar and the choo choo song ( Trainline) would go perfectly hand in hand. It also gives me the idea of taking the choo choo audio and playing it on a continuos loop for the animation. Lately major business are promoting trains etc... if there was ever a time to launch this bar- IT'S NOW!

This is a test I used for the animation. I was only given one image to work on, so used the liquify tool on Photoshop to attempt to create some bending and motion on the animation. Sadly it doesn't work that well, but the rotoscope is a major improvement.


This video is what I used as reference for my rotoscope. We took it in turns to see who would look better and the ways each of us would interpret getting hit by water. It was a fun activity and was good to see we didn't take each other to seriously.


This is the one I did... .Unfortunately i didn't achieve the desired effect and it resembled me 'pawing' at the water in some cat manner. Although very comical, I don't think it would have benefited the animation well

20 March, 2011

Disney

Final Animation

Tests


This is just a test to see how the character moves from side to side. I'm trying to make sure that the timing works well and it isn't off.


I have found that the first animation doesn't work so well. There seems to be a sudden jump when it goes from the back to the side. In this preview, I have incorporated the use of a middle shot, which should hopefully make the transition a little smoother.


I used the walk cycle which can be found in the Animators Survival Guide. Overall I think that it was very helpful as I came to understand how to animate the character. The book really does what it say on the front and it was thanks to this, that I was able to create my walk cycle.


I wanted to see in this test, if I would be able to get away with using a simple static background and working with the character. Although he only appears to be walking on the spot at the moment. I think that with some minor tweaks, I should be able to give the illusion of someone walking into the distance.


Although my character is female, I wanted to see what the movement would be look( referencing the looking over the shoulder). I know that I have included a quick sketch in the RVJ however, believe that capturing on film is always better.


In a lot of Japanese animation, you can see a character jump back and hold this stance as a self defense mechanism. Although sometimes it can be seen serious, I am hoping to add a little twist to make it somewhat humorous.

This is also part of the reference on how the walk looks from behind. I have also incorporated a walk back just incase I decide to include it in the animation.

Moodboard


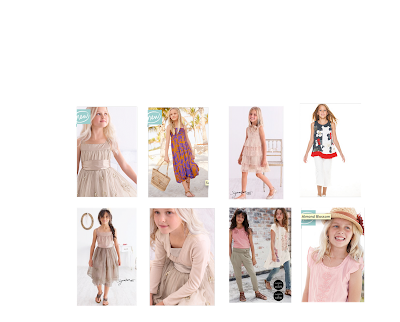
This photo is one that I have decided to use in order to create the character outfit. I have collected the images from Next and will plan to base some of the outfits on it.


This is the animatic that I have created for the animation. I notice that it might go a little quick, however, hopefully you will be able to come to understand what I am trying to achieve. If you want the storyboard- it can be found in my sketchbook along with (paper research).

The only reason for using this- ignoring the audio, is because I needed the reference of someone eating a watermelon. Preferably a child, because this would help me depict what it would look like on my character. Also, the fact that a child tends to eat more messily(could be one of the benefits/behaviors) of my Character (Vlad).


This is a cartoon taken from Scooby Doo. The reason for using it and including it in my blog is because there is some Anticipation in the episode.


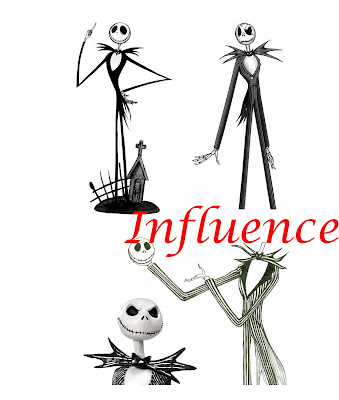
I have used the character design from Jack Skellington as my influence for the Vlad character design. The reason for using this character is, for the over exaggeration of the legs. Overall, I hope that this will help and I should be able to achieve the desired look for my character.


Influencing Animation

I love the design of this animation. I don't know whether it was created on flash or another software however- the simplicity of the character design is very appealing. One thing that I have noted is that the animation uses constant Anticipation, something which I also am planning to use on my animation. The colours are a little too vivid for me at the moment, and would probably tone it down a little. Perhaps the use of blues and purples would work well in the animation. I like the smoothness of it, and style of drawing. Effective yet simplistic.

16 December, 2010

Scene One- Saving

Quick test animation of what it looks like. Hopefully they will be impressed.

/

14 December, 2010

Tests


Jump test- quick playblast


Taking inspiration from Yoshi from Mario, I wanted to add the leg wiggle. This is what it looks like.

Finalizing the wiggle movement. Pretty pleased with the outcome


This is just to test how the pig would drag the briefcase into the scene. Although jumping wouldn't work due to the weight of the object, having looked at the way dogs interact with items, I was able to portray a movement similar to what is depicted above.
This was to see how to make the money move. Obviously there was a lot of trial and error, and this happens to be one of them. I decided against putting it all on


This is a movie to show the first scene, in playblast- low quality render etc.

09 December, 2010

References


The NatWest advert shoes a pig run cycle. It's well done and includes everything- they have thought of timing and spacing, and added the bounce. What makes it more interesting is it doesn't appear to be moving from location when it's running.


The latest advert from Barclays is used to promote how hard it is to keep track of money. Although I imagine everyone has used it, it is a good representation that it can easily escape you. Quite like the coin ambient noises you hear from time to time, think it helps bring it all in and add to the realistic quality of it.


I really wanted to stylize and gives something extra to my character. In order to do this, I animated and looked at the reference and timing for how they did Yoshi.
I did a few tests which can be seen in a hope of achieving something similar.


This was the very first animation I saw and what made me decide that instead of having a pig with the normal walk cycle, I wanted to have it bounce. I really like the squash and stretch and the humor behind it. Overall it's simplistic yet depicts a story.


I wanted to make my pig move like a dog. The only video of decent quality that contained what I was aiming for was this. I am keen on how his hind legs work and the way he drags the object. Very useful for incorporating into my scene.
Used for the reference of money and how it moves.


Once again, just something quick to do with the money and the way it moves and falls. Good thing is it's piles similar to my animation which aids in pulling it together- making it more realistic.

07 December, 2010

Video Support

This is a quick video I did in order to find out how the character would move.

This is me getting up.


I used this as reference for my animatic as I sometimes add too much information to them.


I also wanted to back it up with some research that I have done, into how the industry goes about doing real animatics. I see they skip a lot and it works just fine so I hope to achieve a similar effect.